Lazy Susan
These wood working plans include:
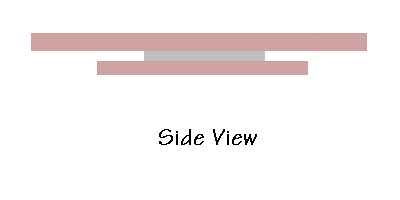
Detailed drawings showing: Top and Side Elevation: giving the dimensions of the unit.
The plans have a List of Materials, showing a breakdown of materials needed for the lazy susan, as well as a list of tools needed.
This is a very basic project, kept simple for the beginning woodworker. The Instructions include directions how to assemble the lazy susan to the board and the base.

List of Materials:
- 1 piece of 3/4" plywood 14" x 14" (or the size of your scrabble board)
- 1 piece of 3/4" plywood 9 1/2" x 9 1/2"
- 1 lazy susan hardware similar to Shepherd #9547
- 8 - #6 x 5/8" wood screws
- Glue
- 8' of 1" wide edging
Tools Needed
- Saw
- Measure tape and pencil
- Screw driver
Instructions
Cut your two pieces of plywood according to your choice or the above dimensions. Don't follow the directions on the lazy susan package, here's a better idea. Place the lazy susan on the bottom, smaller piece. Make sure it is centered both ways. Attach it in place with the screws through the larger holes (rotate the upper plate away about 45°).
With the upper plate rotated 45° to the lower (attached) plate, mark one hole from the upper plate to the bottom board. Drill this hole through the plywood piece used for the base, about the diameter of your srew driver shaft (and bigger than the diameter of the head of your screw). I used a 5/16" drill bit. Now assemble the upper board under the lazy susan and the base (it's upside down now).
When the lazy susan unit is centered place your screw on the end of your screwdriver and insert it into the hole and screw into the top board. Rotate the lazy susan around to screw into the remaining three holes. Clever, eh? This leaves only one hole visible in the base. You can cover the bottom of the base with felt to add a touch of elegance and nobody will ever know how you attached this thing together.
For a final finish, place an edging around the base and the top board of the lazy susan. I kept the edging on the top piece up above the surface of the board by about 1/8" to 1/4", to ensure the Scrabble board stayed put.
Tip: A finishing carpenter never leaves the edge grain of plywood visible in his work. Use edging tape or apply your own edging.
Dave
(Ask Dave) (About Dave)Your source for building tips, woodworking & furniture plans, house plans and building advice directly from Dave...
Hi, I'm Dave Osborne. With over 50 years experience as a journeyman carpenter, foreman and contractor in heavy construction I enjoyed working with apprentices and sharing the tricks of the trade that others shared with me. Now I get emails from Members all over the world and we include many of my answers in our Free Monthly Newsletters. Some of my answers include drawings and instructions specific to a project, but may also answer your questions. I use correct construction terminology, so you can confidently inform your building supply dealers or contractors exactly what you need.
ASK DAVE!
The Benefits of Membership
Membership gives you full access to our hundreds of how-to articles, woodworking plans, converters, calculators and tables. Our Stair Calculator is one of the most popular on the internet. We have projects you can build for (and with) your kids, furniture for your wife, and sheds and gazebos. If you run into a problem or need advice your Membership includes unlimited email questions to me through our Ask Dave quick response button.
Join us!
Copyright © 1999-2024 DDFM Enterprises. All Rights Reserved. DDFM ENTERPRISES, DAVE'S SHOP TALK and the Dave Osborne logo are trademarks and service marks owned by DDFM Enterprises. All other trademarks on this site are the property of their respective owners. Site design by Design Strategies, Inc.