Sunshine Ceiling
These wood working plans include:
Detailed drawings of a plan and elevation showing its dimensions and angles of the sunshine ceiling.
The plans have a List of Materials, showing a breakdown of materials needed for the sunshine ceiling.
The Instructions discuss how to make and install a sunshine ceiling around a 4' fluorescent fixture.
List of Materials:
- 13' of 1x8 oak (or other wood) or 13' of plywood and solid wood edging
- 13' oak (or other wood) shoe molding
- 13' of 3/4" crown molding
- 24"x48" plastic florescent fixture diffuser panel
- 4 - 1 1/2" angle brackets
Instructions
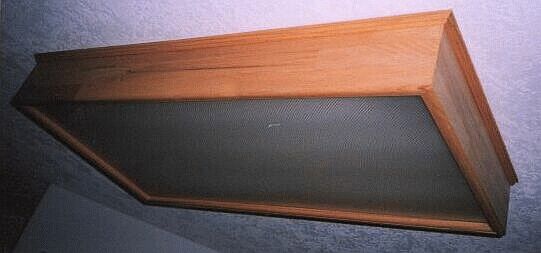
I made up this sunshine ceiling from left over lengths of solid oak flooring. I laid up the pieces for the width I needed, glued them together and when dry, sanded them down with a belt sander. In your case I'd suggest using solid oak, oak veneer or, if you want to paint it, use fir plywood.
For plywood rip the pieces about 3/4" under and install a 3/4" strip of solid wood on the bottom edge. Watch the nails, you don't want to hit them with the router bit. Use glue on all the joints.
Rip your pieces 7" wide and round over the bottom edge with a 3/8" round-over bit in a router. Miter the ends on a 45. Cut 2 pieces not shorter than 49 1/2" when using 3/4" stock and 2 pieces 25 1/2" both long end to long end of the miter joint. This leaves 24" x 48" on the inside when assembled. This is a critical measurement since we will place a 4' flourescent fixture inside the sunshine ceiling along with a 2'x4' plastic diffuser panel.
To hold the diffuser panel in place rip enough molding to form a lip and nail and glue it in place on the bottom of the sunshine ceiling frame on the inside of it.
Bring the molding up the sunshine ceiling frame about an eighth of an inch to show a slight reveal. Sometimes in finishing work it is better to show a slight reveal between two pieces of wood rather than choose to hide the joint by making it flush. This is commonly done around a door jamb with the casing. The molding should be around 1/2" wide by 3/4" high. You can buy a shoe molding (for along a base board), which would do the trick as well.
Paint, stain or clear coat your sunshine ceiling and leave it to dry.
Get a 4' flourescent fixture from your local store, single or double tube, it doesn't matter. Install it in the ceiling where you want it. With the help of a friend temporarily hold the frame up to the ceiling where you want it. Mark on the frame where the ceiling joists are. Put some little angle braces on the inside of the frame right at the top, centered on your marks. One arm of the angle bracket screwed to the sunshine ceiling frame the other to the ceiling joist. Use long enough screws to penetrate the joist.
For a finishing touch cut and install a small crown molding tight to the ceiling and against the frame on the outside. Go easy with the hammer, don't loosen the brackets. This is where an air tacker comes in handy.
Install the diffuser panel on an angle, up into the top of the sunshine ceiling frame and let it come down on the molding lip. This is a bit of a trick, but you'll get it.
Enjoy your new sunshine ceiling!
Dave
(Ask Dave) (About Dave)Your source for building tips, woodworking & furniture plans, house plans and building advice directly from Dave...
Hi, I'm Dave Osborne. With over 50 years experience as a journeyman carpenter, foreman and contractor in heavy construction I enjoyed working with apprentices and sharing the tricks of the trade that others shared with me. Now I get emails from Members all over the world and we include many of my answers in our Free Monthly Newsletters. Some of my answers include drawings and instructions specific to a project, but may also answer your questions. I use correct construction terminology, so you can confidently inform your building supply dealers or contractors exactly what you need.
ASK DAVE!
The Benefits of Membership
Membership gives you full access to our hundreds of how-to articles, woodworking plans, converters, calculators and tables. Our Stair Calculator is one of the most popular on the internet. We have projects you can build for (and with) your kids, furniture for your wife, and sheds and gazebos. If you run into a problem or need advice your Membership includes unlimited email questions to me through our Ask Dave quick response button.
Join us!
Copyright © 1999-2026 DDFM Enterprises. All Rights Reserved. DDFM ENTERPRISES, DAVE'S SHOP TALK and the Dave Osborne logo are trademarks and service marks owned by DDFM Enterprises. All other trademarks on this site are the property of their respective owners. Site design by Design Strategies, Inc.